21 Jun 2022
How to build a multi-step form in Vue
Forms and data input are always an essential aspect of any web application. At times, the web app may require to present the user with a series of inputs. Multi-step forms help achieve this goal with a stellar and distinct user experience. Today we’ll be building a multi-step form in vue using typescript and Tailwindcss and daisyUI, both of which compile down to plain css hence avoiding any increase in bundle size.
You can checkout the finished product here or take a look at the source code here.
Setup
The project was scaffolded using vite with the vue-ts template. Run the command below and select vue-ts as the template from the vue option.
npm create viteInstallation instruction for tailwindcss can be found here. Their docs are brilliant, so you will have a better time over there 😇.
To install daisyUI run:
npm i daisyUI --save-devThen add daisyUI to your tailwind.config.js files:
  module.exports = {
  //...
  plugins: [require("daisyui")],
};
Form steps
Each section of the multi-step form is its own individual component. This allows the implementation to be modular so that the individual elements can manage their own data binding and logic whilst limiting concern from other components.
Below are a few sample steps (styled with tailwind and daisyUI), but feel free to experiment with your own.
- Step 1 → ./src/components/Step1.vue
<template>
  <div class="form-control w-full">
    <label class="label">
      <span class="label-text">What is your name?</span>
    </label>
    <input
      type="text"
      placeholder="Type here"
      class="input input-bordered w-full"
    />
  </div>
  <div class="form-control max-w-xs pt-4">
    <label class="cursor-pointer label">
      <span class="label-text">I am awesome</span>
      <input type="checkbox" checked="checked" class="checkbox" />
    </label>
  </div>
</template>- Step 2 → ./src/components/Step2.vue
<template>
  <div class="form-control w-full">
    <label class="label">
      <span class="label-text">Pick the best fantasy franchise</span>
    </label>
    <select class="select select-bordered">
      <option disabled selected>Pick one</option>
      <option>Star Wars</option>
      <option>Harry Potter</option>
      <option>Lord of the Rings</option>
      <option>Planet of the Apes</option>
      <option>Star Trek</option>
    </select>
  </div>
</template>- Step 3 → ./src/components/Step3.vue
<template>
  <div class="form-control w-full flex items-center justify-center">
    <h2 class="text-xl py-3">Rate this tutorial</h2>
    <div class="rating rating-lg">
      <input type="radio" name="rating-9" class="rating-hidden" />
      <input type="radio" name="rating-9" class="mask mask-star-2" />
      <input type="radio" name="rating-9" class="mask mask-star-2" checked />
      <input type="radio" name="rating-9" class="mask mask-star-2" />
      <input type="radio" name="rating-9" class="mask mask-star-2" />
      <input type="radio" name="rating-9" class="mask mask-star-2" />
    </div>
  </div>
</template>
Displaying steps and step progress
This is where the powerful class styles of daisyUI come in handy to elegantly style the progress indicator with a single class definition.
./src/components/MultiStepForm.vue → template section
<template>
  <div class="w-6/12">
    <ul class="steps min-w-full">
      <li
        v-for="(stepText, index) in props.steps"
        class="step"
        :class="index <= step ? 'step-primary' : ''"
      >
        {{ stepText }}
      </li>
    </ul>
  </div>
</template>
./src/components/MultiStepForm.vue → script section
<script lang="ts" setup>
import { ref } from "vue";

let step = ref(0);
const props = defineProps<{
  steps: string[];
}>();
</script>
Now, we will import our new component into the App.vue file
./src/App.vue
<template>
  <div class="flex flex-col items-center justify-center h-screen">
    <MultiStepForm
      :steps="['Personal information 👶', 'Series 📺', 'Feedback 🌟']"
    />
  </div>
</template>

<script lang="ts" setup>
import MultiStepForm from "./components/MultiStepForm.vue";
</script>
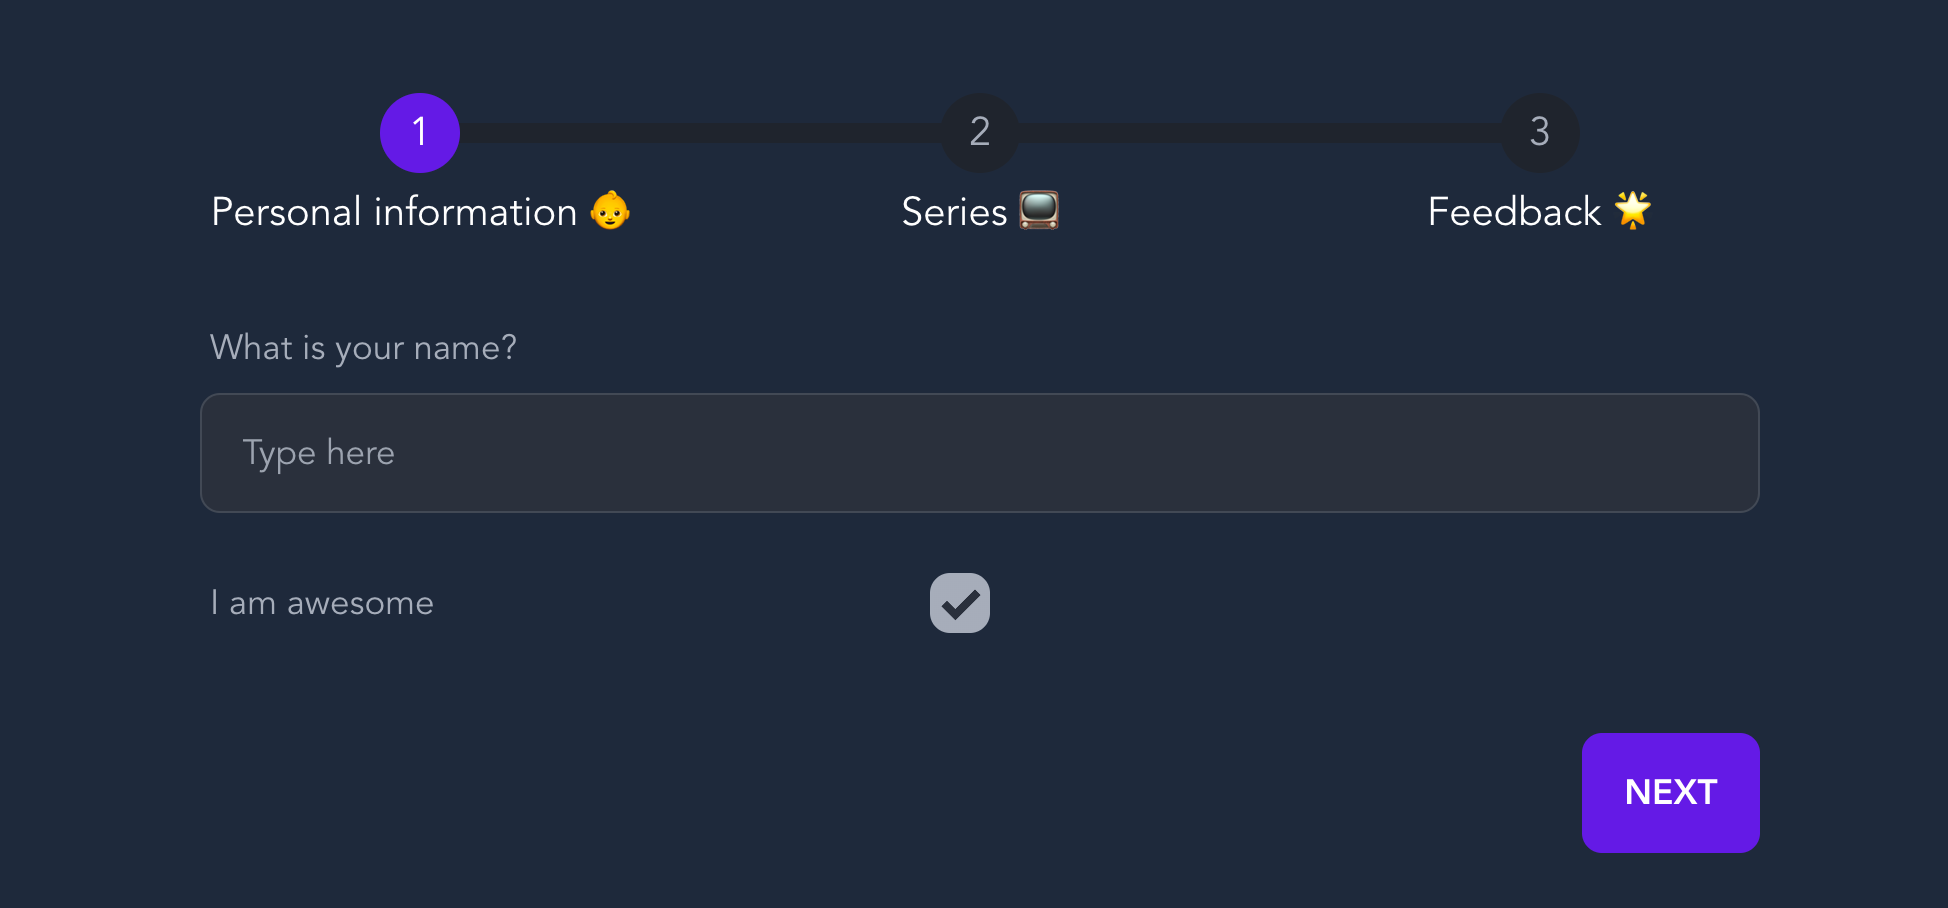
The page should now be looking similar to this.

Accepting step components as props
We can start accepting vue components as props for our MultiStepForm component with typesafety thanks to the power of typescript (in particular type inference).
./src/components/MultiStepForm.vue → script section
<script lang="ts" setup>
// ....
import Step1 from "./Step1.vue";
// ...
const props = defineProps<{
  forms: (typeof Step1)[]; // inferring the component type of one of our steps
  steps: string[];
}>();
</script>
Rendering components within the form
We can now render the components we have received as props using vue’s special built-in element: component.
./src/components/MultiStepForm.vue → template section
<template>
<!-- ...progress indicator... -->
<div class="py-3"></div>
<form @submit.prevent class="min-w-full px-6">
  <component :is="props.forms[step]"></component>
    <div class="py-4"></div>
    <div class="flex justify-end">
      <button class="btn btn-ghost" type="button" v-if="step!==0" @click="step--">Back</button>
      <button class="btn btn-primary" type="submit" v-if="step!==props.steps.length-1">Next</button>
      <button class="btn btn-primary" type="submit" v-if="step==props.steps.length-1">Submit</button>
    </div>
</form>
</div>
</template>
Add next and previous step logic
To traverse through our array of components, we simply need to increment the value of our reactive variable step. We also need to make sure our back, next and submit buttons are only active at certain conceptual environments.
./src/components/MultiStepForm.vue → script section
<template>
  <!-- within the form -->
  <div class="py-4"></div>
  <div class="flex justify-end">
    <button
      class="btn btn-ghost"
      type="button"
      v-if="step !== 0"
      @click="step--"
    >
      Back
    </button>
    <button
      class="btn btn-primary"
      type="submit"
      v-if="step !== props.steps.length - 1"
    >
      Next
    </button>
    <button
      class="btn btn-primary"
      type="submit"
      v-if="step == props.steps.length - 1"
    >
      Submit
    </button>
  </div>
  <!-- within the form -->
</template>
Handle final submit
We will now pass in and accept a submitFunction as a prop to our component to execute once all the steps have been completed.
./src/components/MultiStepForm.vue → script section
<script lang="ts" setup>
// ...
const props = defineProps<{
  forms: (typeof Step1)[];
  steps: string[];
  submitAction: () => void;
}>();

const formAction = () => {
  if (step.value !== props.steps.length - 1) return step.value++;
  props.submitAction();
};
// ...
</script>
./src/App.vue
<template>
  <div class="flex flex-col items-center justify-center h-screen">
    <MultiStepForm
      :forms="forms"
      :steps="['Personal information 👶', 'Series 📺', 'Feedback 🌟']"
      :submit-action="submitAction"
    />
  </div>
</template>

<script lang="ts" setup>
import MultiStepForm from "./components/MultiStepForm.vue";
import Step1 from "./components/Step1.vue";
import Step2 from "./components/Step2.vue";
import Step3 from "./components/Step3.vue";

const forms = [Step1, Step2, Step3];
const submitAction = () => {
  console.log("submitting form...");
};
</script>
Summary
There we have it, a type-safe implementation of a multi-step form in vue with an elegant design and UX through tailwindcss and daisyUI. For a quick reference you can also checkout the codesandbox below 👇.
You can find the source code on GitHub. Be sure to give the project a start if you find this tutorial helpful!
